Getting started
1. Sign up to Infura
Sign up for an account on the Infura website, enter your details, and select CREATE A FREE ACCOUNT.
To activate your account, verify your email address by clicking the link sent to your inbox.
Based on your plan, Infura allows for the following amount of API keys:
- Free plan - Allows one API key.
- Developer plan - Allows up to five API keys.
- Team plans and higher - No limit on the number of API keys.
For more information refer to the Infura pricing information.
2. Configure your API key
Once verified, you’ll be taken to the Infura dashboard where you can configure your auto-generated API key.
Infura will automatically generate the My First Key API key for you.

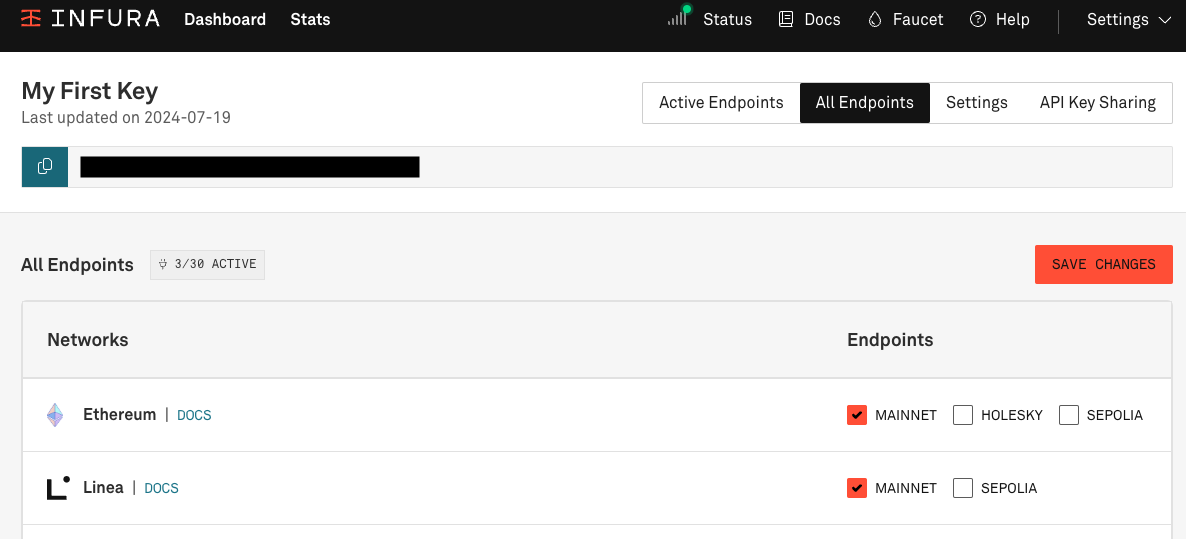
In the API key page that appears, select My First Key to access your API key settings. In the All Endpoints tab, select the networks that you wish to connect to, and select Save Changes.
In this example, we've selected the Ethereum mainnet and Linea mainnet networks.
3. Send requests
Use the API key when sending requests. The following examples interact with the Ethereum network by sending requests using HTTP.
- All requests are
POSTrequests. - Replace
YOUR-API-KEYwith your own unique API key.
Use a tool such as the Client Uniform Resource Locator (curl) or Postman to make requests. We recommend using Postman if you're a Windows user.
3.1 Get the current block number
Retrieve the current block number.
- cURL
- Postman
curl https://mainnet.infura.io/v3/YOUR-API-KEY \
    -X POST \
    -H "Content-Type: application/json" \
    --data '{"jsonrpc": "2.0", "id": 1, "method": "eth_blockNumber", "params": []}'
URL: https://mainnet.infura.io/v3/YOUR-API-KEY
Request_Type: POST
Body:
{
    "jsonrpc":"2.0",
    "method":"eth_blockNumber",
    "params":[],
    "id":1
}
You'll receive a response similar to:
{"jsonrpc":"2.0","id":1,"result":"0xde5fba"}
The data returned is in hexadecimal, prefixed with 0x. If you convert de5fba to decimal, the resulting number is 14573498, representing the current block number at the time the query was made.
3.2 View the Ether balance of a specified contract
Check the balance of an Ethereum smart contract.
The example code checks the latest balance of the Ethereum Proof of Stake (PoS) contract.
- cURL
- Postman
curl https://mainnet.infura.io/v3/API-KEY \
    -X POST \
    -H "Content-Type: application/json" \
    -d '{"jsonrpc":"2.0","method":"eth_getBalance","params": ["0x00000000219ab540356cBB839Cbe05303d7705Fa", "latest"],"id":1}'
URL: https://mainnet.infura.io/v3/YOUR-PROJECT-ID
Request_Type: POST
Body:
{
  "jsonrpc":"2.0",
  "method":"eth_getBalance",
  "params": [
      "0x00000000219ab540356cBB839Cbe05303d7705Fa",
      "latest"
  ],
  "id":1
}
You'll receive a result similar to:
{"jsonrpc":"2.0","id":1,"result":"0x96c8e932f1e499c855045"}
This result is the hexadecimal value of the contract in Wei (the smallest denomination of Ether).
The decimal conversion of the result is 11392978000069000000000069 Wei, which equals 11392978.000069000000000069 Ether.
4. Secure your API key
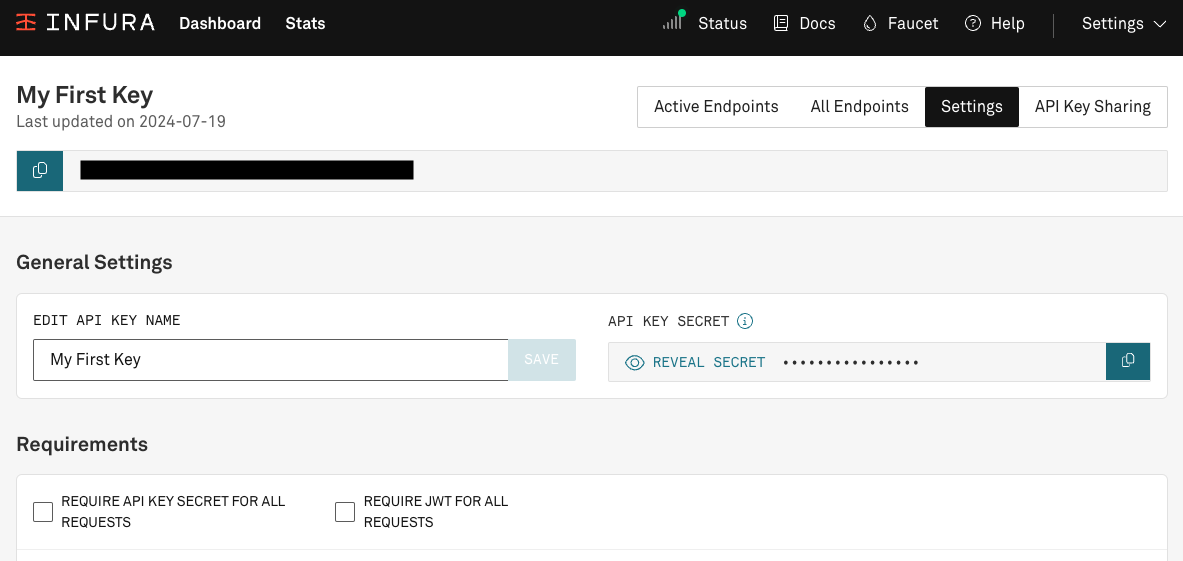
Configure security settings in the Settings tab. This is optional.
Force API requests to include the API key secret and/or JSON Web Tokens (JWTs).
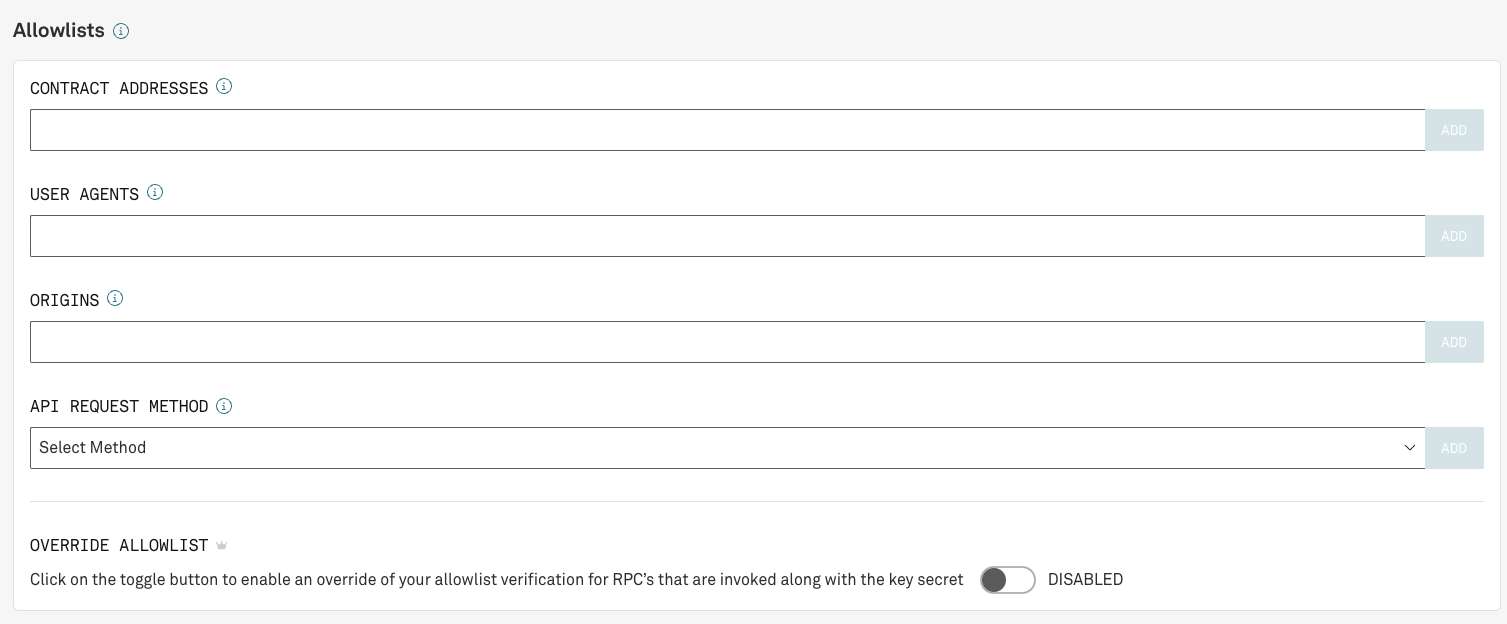
Use an allowlist to restrict API key access. See to the allowlist documentation for configuration instructions and best practices.
5. View your project stats
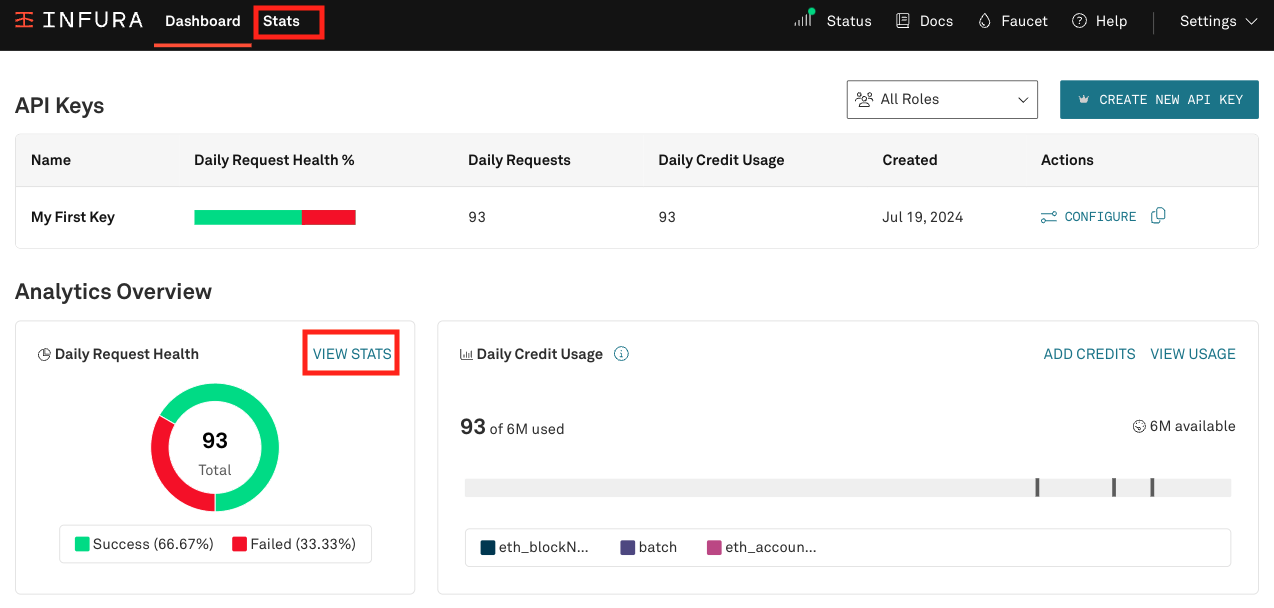
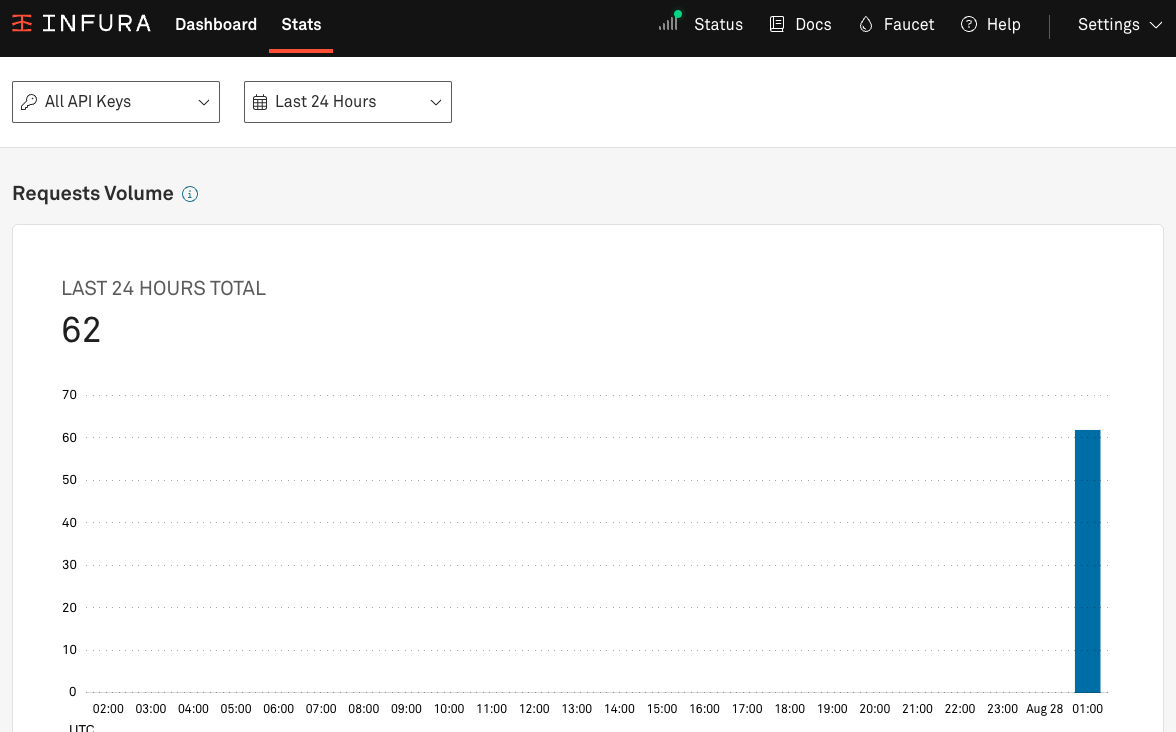
The Infura dashboard displays an overview of your daily request health and daily credit usage. Select View Stats or stats to monitor your project request stats.
From the Stats page of the Infura dashboard, you can view real-time statistics about your API usage. Optimize your app and better understand your users by reviewing your API request stats regularly.
6. View your credit usage
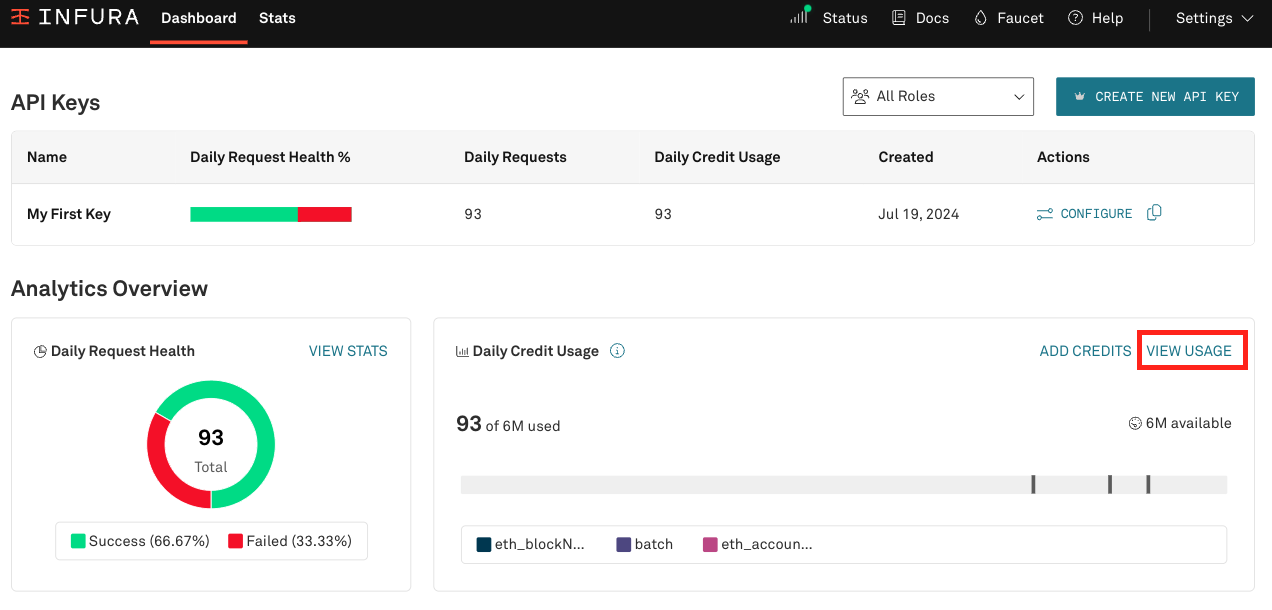
The Infura dashboard provides an overview of your daily credit usage. Select View Usage for a wider view of your credit usage.
The credit pricing model replaces request-based billing for free-tier (Core) customers. Customers on Developer and Team plans will be transitioned to the credit model on September 30, 2024.
Existing customers on Growth and Custom plans will remain on request-based billing.
7. Manage your account
Find additional settings in Settings to manage your account. You can:
- Set notifications for daily limits from the Account option.
- Manage your billing information in the Billing option.
- Manage shared API keys in the Key Sharing option.
